If you want faster offers for your Deerfield Township home, start with better photo angles. Most buyers begin their search online and rely on photos to decide which homes to tour. That means the way each room is framed, lit, and sequenced can lift your click-throughs and showing requests. In this guide, you’ll learn which angles work best for common local floor plans, how to time your exterior shots in Warren County, and what to prioritize in your first 10 images. Let’s dive in.
Why angles matter in Deerfield Township
Deerfield Township has a mix of ranches, two-story Colonials, split-levels, and newer open-plan builds. Each layout benefits from different angles to show flow, light, and usable space. Your goal is simple: create images that drive clicks, convert interest to showings, and support stronger offers.
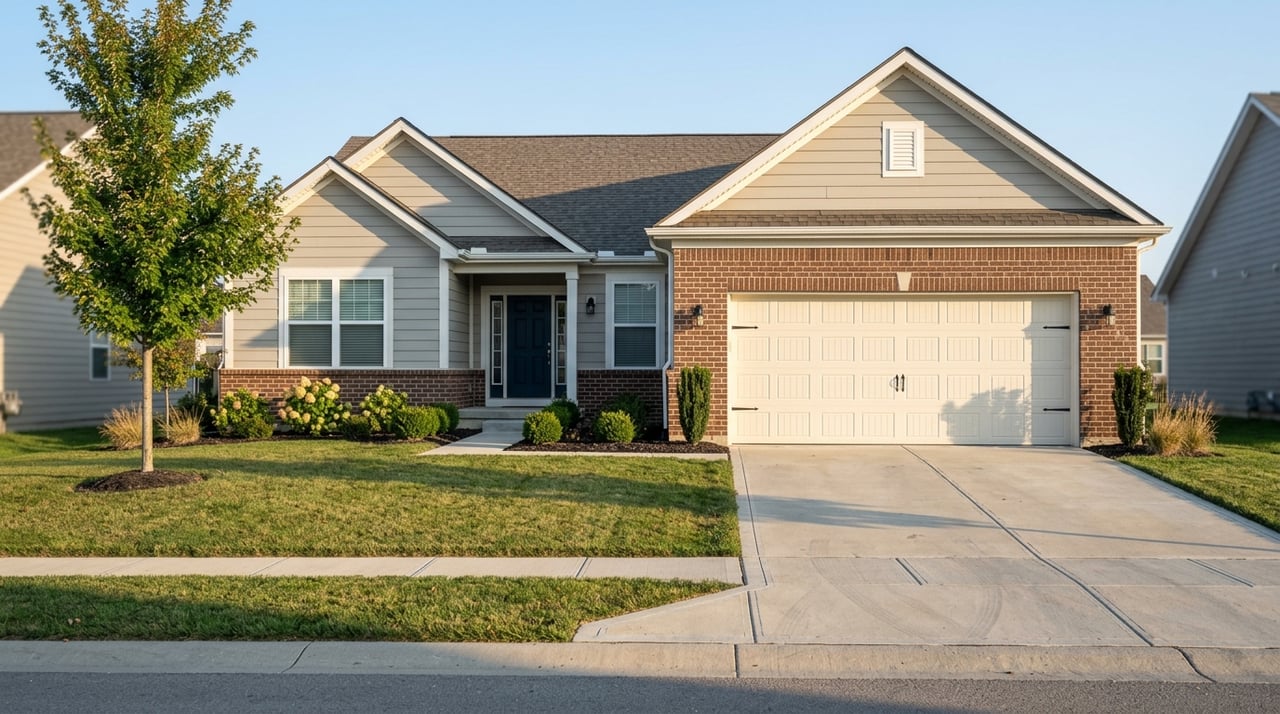
Focus on your first 6 to 10 photos. Lead with a sharp exterior hero, then your main living areas, kitchen, primary suite, and backyard. These images often decide whether buyers schedule a tour.
Core photo principles that get clicks
Composition and angles
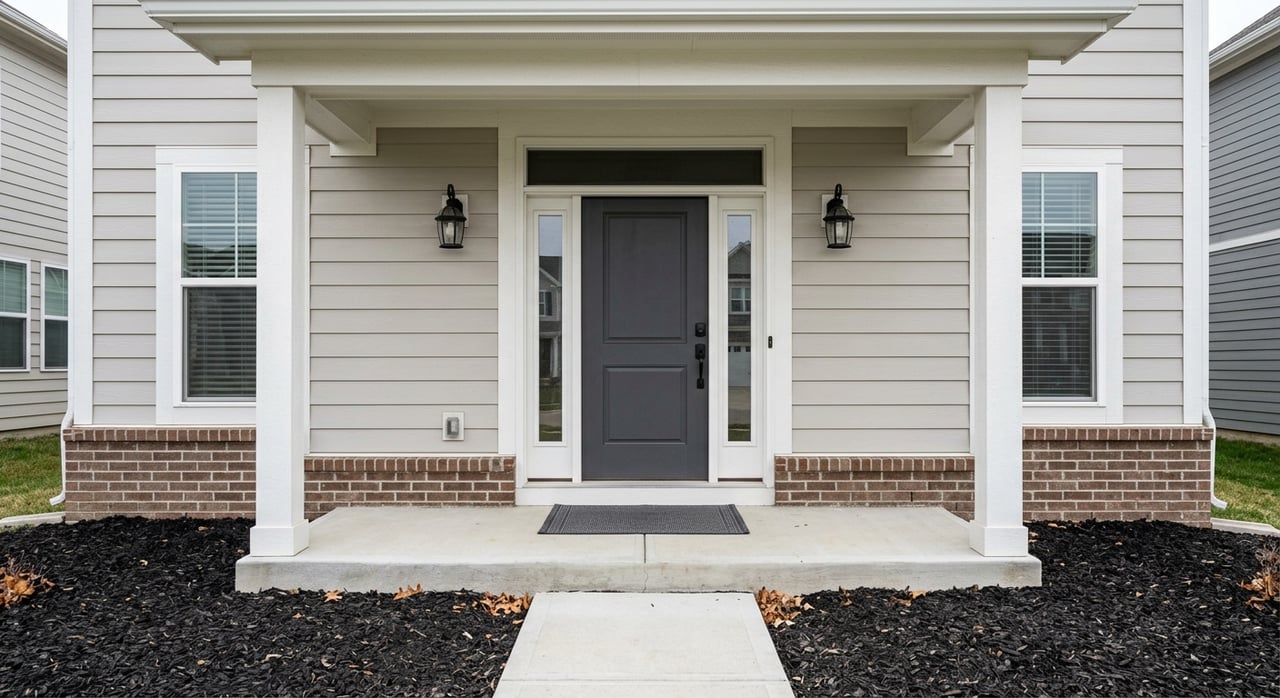
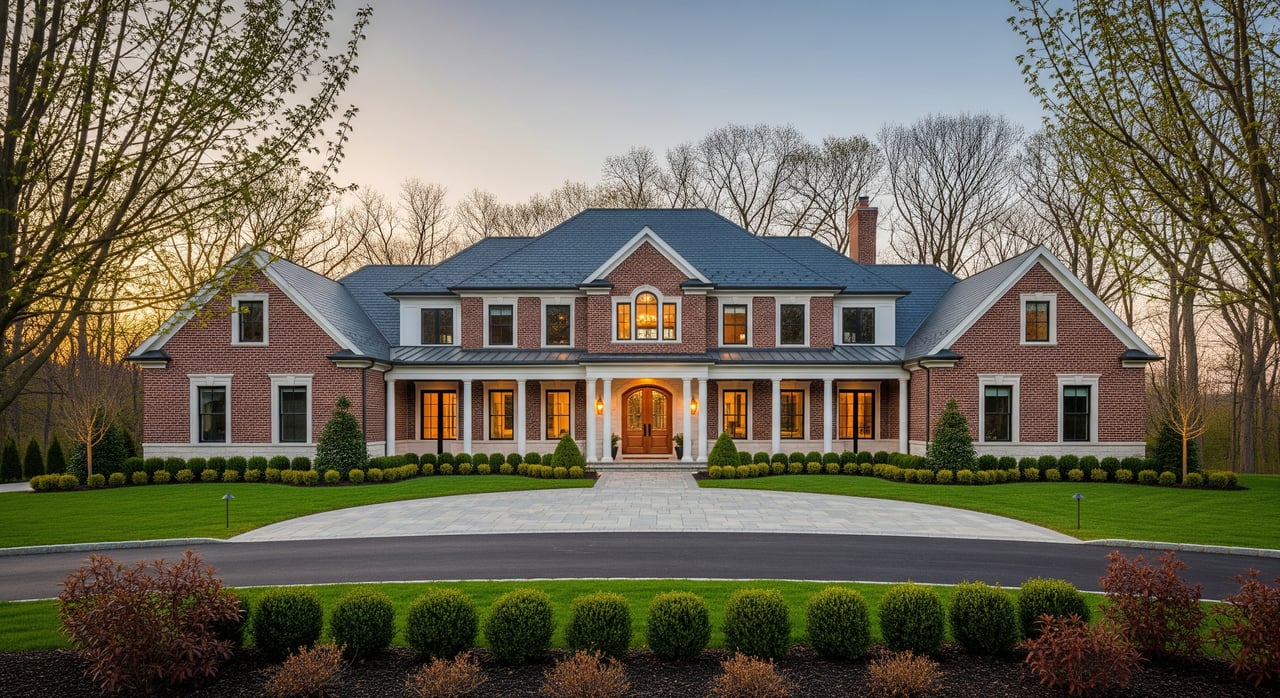
- Start with a three-quarter exterior view at roughly 45 degrees to show depth and front elevation.
- Indoors, shoot from a corner or doorway to reveal sightlines and room flow.
- In kitchens, include the island and views into adjoining spaces.
Lens and framing
- Use a wide but controlled field of view around the 20–35 mm full-frame equivalent.
- Keep camera height near 4–5 feet indoors. Slightly higher for kitchens helps show counters and island.
- Favor horizontal images for rooms, with a few verticals for mobile and details.
Lighting and exposure
- Use natural light whenever possible. Open blinds and curtains.
- Use fill flash or bracketed exposures to balance bright windows with indoor detail.
- Keep colors believable by managing white balance.
Staging basics
- Clear counters, remove personal items, hide bins and hoses, and park cars off the driveway.
- Make beds and stage the kitchen, living room, and primary suite.
Visual priority order
- Exterior hero
- Foyer or main living space showing flow
- Kitchen with island and sightlines
- Primary bedroom and bath
- Backyard or patio
- Unique selling points like a finished basement or office
Best angles by floor plan
Ranch and single-story homes
- Lead with a corner exterior that shows the façade and front yard.
- Living room: shoot diagonally from a corner to reveal the path to dining and kitchen.
- Kitchen: capture the island, appliances, and connection to the family room.
- Primary suite: shoot from the doorway with window light in frame. Include the bath and any walk-in closet.
- Backyard: stand at a back corner to show depth and lot lines.
Angle tip: Highlight transitions to the patio or deck to emphasize single-level convenience.
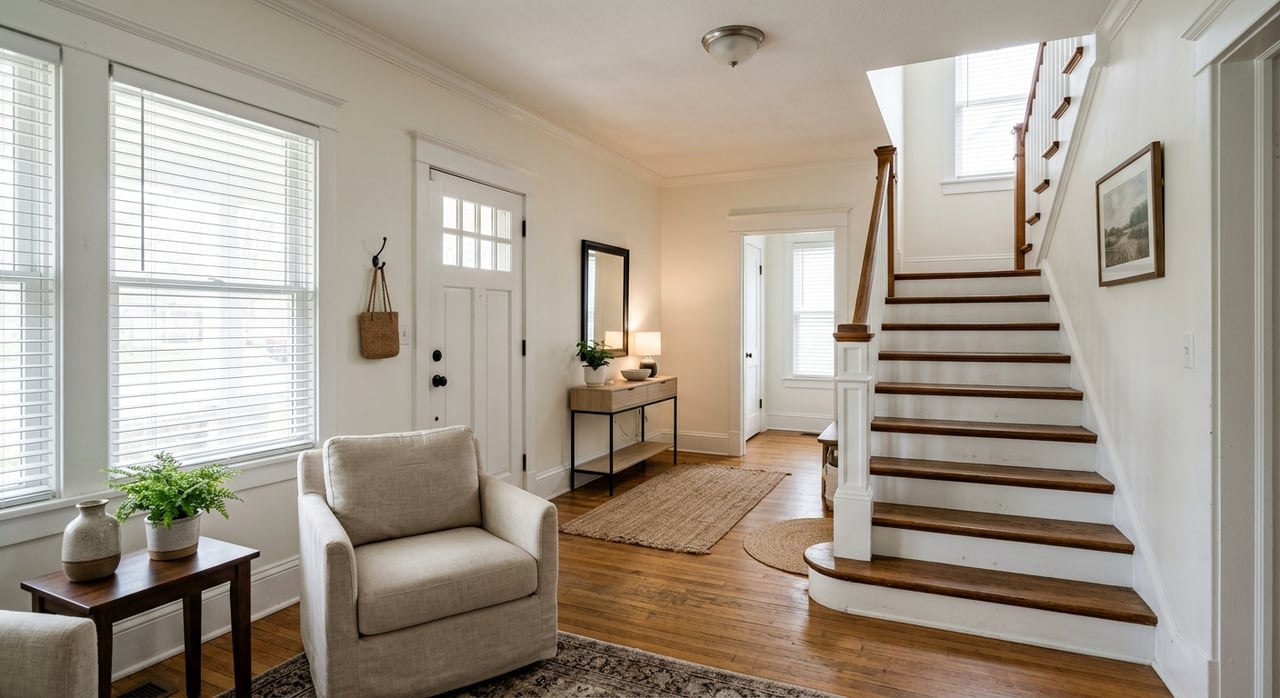
Two-story and Colonial layouts
- Exterior: a 45-degree angle that includes the walkway looks welcoming.
- Foyer: a wide shot that shows stairs or an entry view into main living areas.
- Living and dining: corner angles to show proportions and flow.
- Kitchen and family room: show the island, fireplace if present, and sightlines between spaces.
- Primary suite and bath: include the closet and double vanity if applicable.
- Backyard: one wide shot of usable space, plus an optional aerial to show the lot.
Angle tip: Include at least one photo that shows the staircase to help buyers understand vertical flow.
Split-level homes
- Exterior: choose a view that reveals the multi-level façade.
- Entry: include the landing with stairs up and down to explain circulation.
- Upper living/dining: corner shots to capture scale.
- Lower family or rec room: frame ceiling height and any egress windows.
- Backyard: show terracing or steps if present.
Angle tip: Use a few images that map how the levels connect so buyers do not feel lost online.
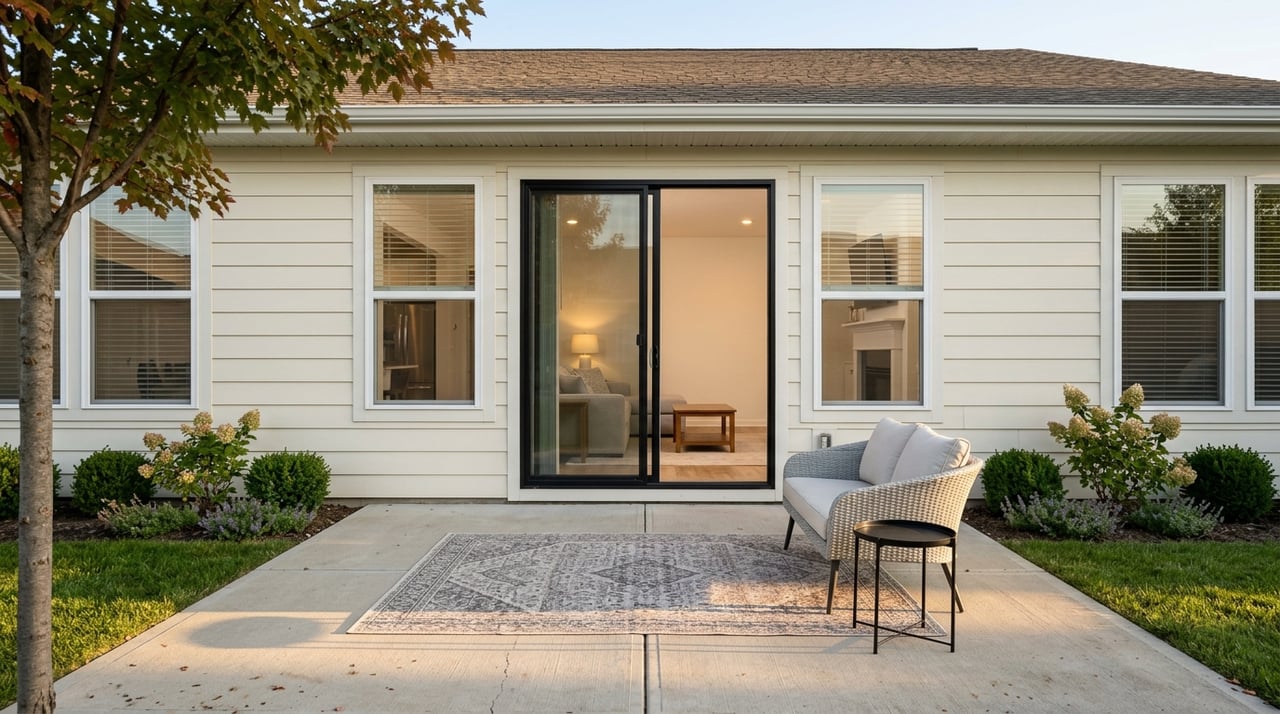
Open-plan and newer construction
- Great room: from a corner, show the kitchen, island, and large windows or sliders in one frame.
- Kitchen: a slight top-down angle from standing height helps showcase the island and appliance wall.
- Dining: include access to outdoor living.
- Primary suite: wide shots showcasing spa features in the bath.
- Bonus spaces: mudroom, pantry, and built-ins.
Angle tip: One or two wide shots that show multiple functional areas together can increase perceived space.
Finished basements and walkout levels
- Show where the stairs connect to the main floor.
- Use a wide view to reveal ceiling height and natural light.
- Highlight a bar, theater setup, or rec zone if available.
- Include the exterior walkout door and its connection to the yard.
Angle tip: Buyers value lower-level usability. Make light sources and access clear.
Multi-car garages, outbuildings, and larger lots
- Exterior: capture garage doors and orientation.
- Interior: show width, storage, and built-ins.
- Outbuildings: shoot from multiple angles to show distance from the home.
- Consider a drone shot to outline lot size and context when appropriate.
Exterior timing for Warren County
Lighting changes everything, especially for exteriors. Use these timing rules for front-facing photos:
- East-facing fronts: morning light from sunrise to late morning.
- West-facing fronts: late afternoon or early evening.
- South-facing fronts: morning or late afternoon for softer light.
- North-facing fronts: even light most of the day. Choose a sunny sky for added contrast.
Golden hour gives warm tones and attractive skies. Overcast days give even light and rich colors outside and help control window glare inside. Avoid harsh midday sun for your hero exterior when possible.
Seasonal curb appeal checklist
- Spring: show fresh landscaping and trimmed shrubs. Early morning can add a crisp look.
- Summer: emphasize decks, patios, and pools. Shoot early or late to avoid bleached colors.
- Fall: use colorful foliage and warm exterior lighting. Keep walkways clear of leaves.
- Winter: shovel driveways and walkways, remove icicles, and frame snow so it looks cared-for.
After a gentle rain, colors often look saturated and clean. Just avoid large puddles in the driveway shot.
Make your first 10 photos count
Order your images to tell a story and convert clicks:
- Exterior hero in flattering light
- Foyer or a main living area that shows flow
- Kitchen with island
- Family room with fireplace or key feature
- Primary bedroom
- Primary bath
- Backyard, deck, or patio
- Finished basement or bonus space
- Office or flex room
- Garage, pantry, or mudroom if notable
Drone and MLS considerations
Aerials can help in suburban neighborhoods by showing lot size, orientation, and proximity to amenities. For commercial drone use, operators should follow FAA Part 107 rules and respect airspace and privacy. Check your local MLS for photo count limits, file size requirements, and any rules about virtual tours or floor plans. Deliver high-resolution JPGs in sRGB and keep RAW files for edits.
Recommended deliverables include 20 to 35 purposeful images for a typical 3 to 4 bedroom home, 1 to 3 verticals for mobile, 1 to 2 optimized thumbnails, and a few social crops.
Simple shoot-day plan
- Start with exteriors when the light is right based on your home’s orientation.
- Move indoors and shoot with natural light first, then add fill as needed.
- Capture upper floors and bedrooms early while they are perfectly staged.
- Finish with basement and garage, then neighborhood shots or a twilight exterior if planned.
Common pitfalls to avoid
- Overly wide lenses that distort room size.
- Clutter, personal photos, and cars in the driveway.
- Mixed lighting that turns white walls orange or blue.
- Isolated room shots that do not show how spaces connect.
When your photos show flow, light, and lifestyle, buyers can picture themselves living there. That is what drives showings and stronger offers.
Ready to market your Deerfield Township home with a proven plan for photos, staging, and speed to market? Team Bush pairs big-team marketing systems with warm, responsive service across Greater Cincinnati. Get your Free Home Valuation today and see how our process can move you forward.
FAQs
What are the most important first photos for a Deerfield Township listing?
- Lead with a crisp exterior hero, then your main living space, kitchen with island, primary suite, and the backyard or deck to maximize clicks and showing requests.
How do I choose the right time of day for exterior photos in Warren County?
- Match your front elevation to the sun: east in the morning, west in late afternoon, south in morning or late day, and north most of the day with even light.
Which rooms should I stage first for listing photos?
- Prioritize the kitchen, living room, primary bedroom, and primary bath, then add attention to any finished basement or flex space that will help your home stand out.
Do I need drone photos for a suburban Deerfield Township home?
- Drone shots help when lot context matters or when you want to show proximity to amenities; ensure the operator follows FAA Part 107 and local rules.
How many photos should I include on the MLS for a typical 3–4 bedroom home?
- Aim for 20 to 30 purposeful images, including 1 to 2 strong thumbnails and a balanced set of main rooms, unique features, and outdoor spaces.